Create SharePoint app for SharePoint 2013 using Angular2 with TypeScript
On 18th of September 2014 was pushed the initial commit of version 2.0 of the AngularJS framework. A few weeks ago the core team at Google, published AngularJS’ 2.0 and gave a couple of talks on ng-conf about their new router, change detection, templating, etc. I’m passionate about AngularJS since its early versions so I decided give it a try using the quick start.
Recently, I got work to create a app for Office 365 and for this we had decided to use AngularJS’ 2.0 with TypeScript to create SharePoint app (I am using SharePoint 2013). As AngularJS’2.0 is new, I got many challenges to create this app. In this blog post I will share my experience of this without making it more subjective:
Prerequisites:
- Visual Studio 2013 or 2015 – I am using Visual Studio 2015 for this demo.
- Office 365 online account – SharePoint online
Create Application
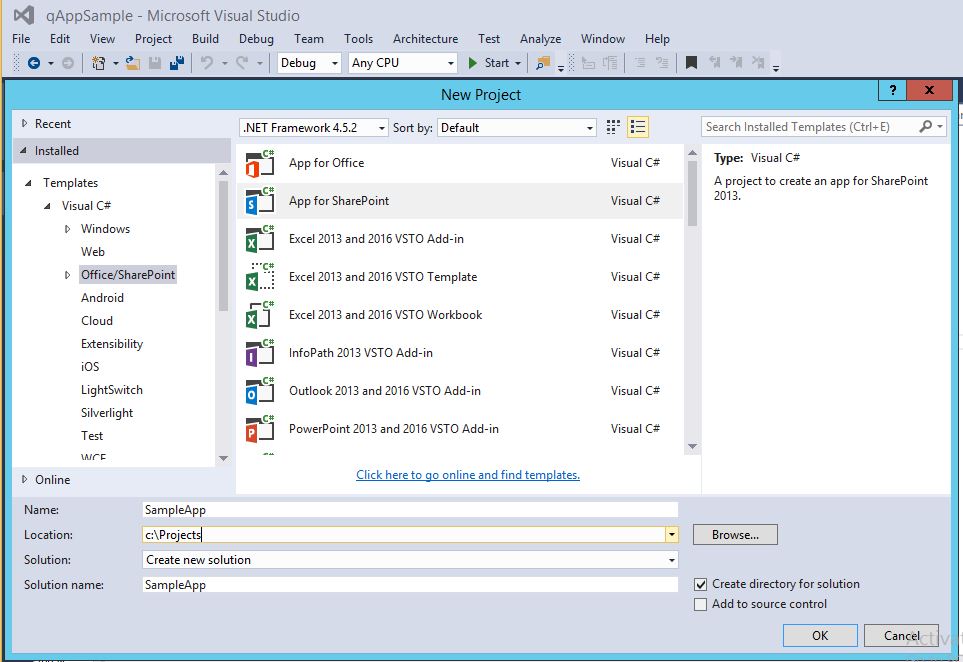
- Open your Visual Studio and click on “New Project”.
- Select “Installed -> Templates -> Visual C# -> Office/SharePoint –> App for SharePoint”
- Name your project and click on “OK”. I am assuming here my app name is “sampleApp”.
- A new wizard will open with step “Specify the app for SharePoint setttings”. Add your office 365 (SharePoint Developer site) URL in the place of “What SharePoint site do you want to use for debugging your app?”. Like “https://yourdomain.sharepoint.com/sites/angularapps-dev/”
- Select “SharePoint-hosted” in “How do you want to host your app for SharePoint?”.
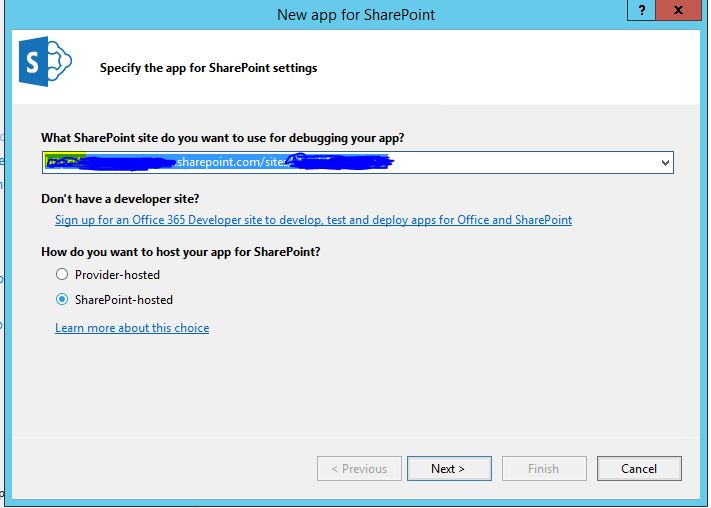
- Click “Next” to go to next step.
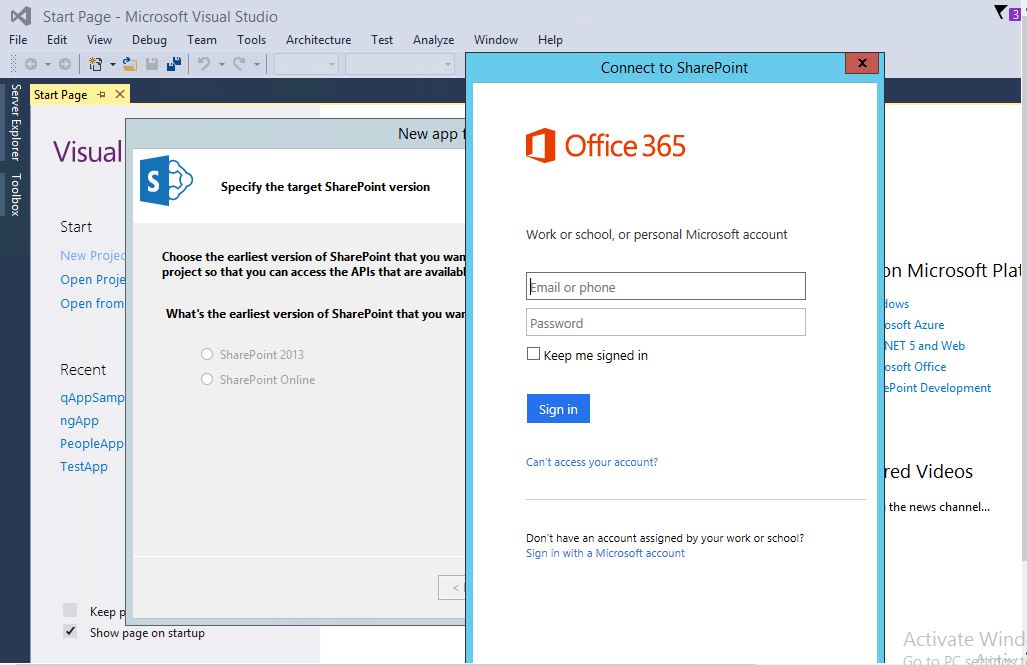
- In the “Specify the target SharePoint version” step, select “SharePoint Online” ( I am using SharePoint online for this demo). If you are not logged in your Office 365 account, it will ask to login before selecting any option.
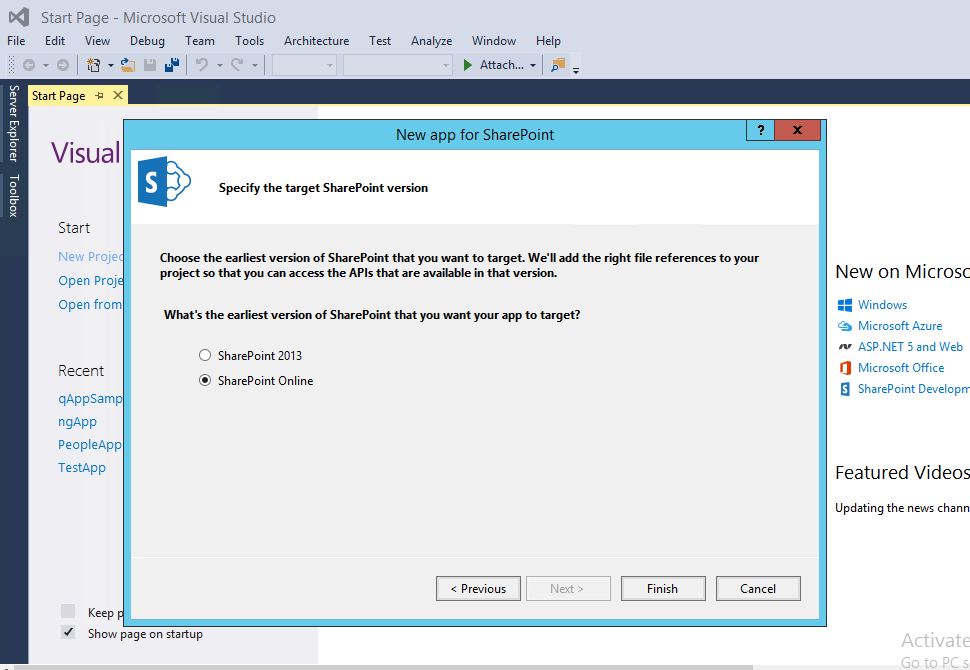
- Click on “Finish” to create this application and open in Visual Studio.
Configure your application for Angular2
We cannot write “tsconfig.json” file directly in the root of our application as SharePoint app is not allowing this. We need to add TypeScript configuration in the .csproj file. For this use following steps:
- Open solution explorer in visual studio where our application is open. Now right click on application (“sampleApp”) and then select “Unload Project”.
- Right click on unloaded project and select “Edit sampleApp.csproj”.
- Add following line under project node. This will enable and display “TypeScript Build” section in properties of project where we can set some setting for TypeScript.
<Import Project="$(MSBuildExtensionsPath32)\Microsoft\VisualStudio\v$(VisualStudioVersion)\TypeScript\Microsoft.TypeScript.targets" Condition="Exists('$(MSBuildExtensionsPath32)\Microsoft\VisualStudio\v$(VisualStudioVersion)\TypeScript\Microsoft.TypeScript.targets')" /> - Add following properties for “Debug” and if require for “Release” too.
<PropertyGroup Condition="'$(Configuration)' == 'Debug'">
<TypeScriptTarget>ES5</TypeScriptTarget>
<TypeScriptJSXEmit>None</TypeScriptJSXEmit>
<TypeScriptCompileOnSaveEnabled>True</TypeScriptCompileOnSaveEnabled>
<TypeScriptNoImplicitAny>False</TypeScriptNoImplicitAny>
<TypeScriptModuleKind>CommonJS</TypeScriptModuleKind>
<TypeScriptRemoveComments>False</TypeScriptRemoveComments>
<TypeScriptOutFile />
<TypeScriptModuleResolution>node</TypeScriptModuleResolution>
<TypeScriptOutDir />
<TypeScriptGeneratesDeclarations>False</TypeScriptGeneratesDeclarations>
<TypeScriptNoEmitOnError>True</TypeScriptNoEmitOnError>
<TypeScriptSourceMap>false</TypeScriptSourceMap>
<TypeScriptMapRoot />
<TypeScriptSourceRoot />
<TypeScriptEmitDecoratorMetadata>True</TypeScriptEmitDecoratorMetadata>
<TypeScriptExperimentalDecorators>True</TypeScriptExperimentalDecorators>
</PropertyGroup>
- Save & close the file. Right click on unloaded project in solution explorer and click on “Reload Project”.
- To change few settings of TypeScript you can right click on project and select “Properties”. There we can see “TypeScript Build” section to set some settings. Add “npm run tsc” in “pre-build event command line” under “Build Events” section.
Installation of necessary files
To make this app in angular2 we need to install few files:
- SharePoint.d.ts
- jQuery.d.ts
- angular2-polyfills.js
- es6-shim.min.js
- system.src.js
- Rx.js
- angular2.dev.js
First two from above list can be installed using “NuGet Package Manager” and rest can be installed using npm (Node package Manager – NPM must be installed in your development machine).
Let’s start installing above files (SharePoint.d.ts and jQuery.d.ts):
- Right click on project and select “Manage NuGet Packages..”. NuGet Package Manager window will open.
- Go to “Browse” step and search for “sharepoint.TypeScript.DefinitelyTyped”, install latest version of this.
- Search for “jquery.TypeScript.DefinitelyTyped” and install latest version.
You can find these files in “Scripts/typings” folder.
Now, let’s install other files.
- Open “Command Prompt” with administrator privilege (“Run as administrator”).
- Go to project location where your project files are stored. In our application it is “C:\projects\sampleApp\sampleApp”.
- Before installing above files we should create a “package.json” file. Execute “npm init” in command prompt window and hit “Enter” button.
- Change or go with defaults for settings. Our package.json file is created. Now open the file and add/update following:
"dependencies": { "angular2": "^2.0.0-beta.0", "bootstrap": "^3.3.6", "es6-promise": "^3.0.2", "es6-shim": "^0.34.1", "reflect-metadata": "^0.1.3", "rxjs": "^5.0.0-beta.0", "systemjs": "^0.19.13", "tsd": "^0.6.5", "zone": "^0.3.4", "zone.js": "^0.5.10" }, "devDependencies": { "concurrently": "^1.0.0" }, "scripts": { "tsc": "tsc", "tsc:w": "tsc -w", "start": "concurrent \"npm run tsc:w\" " } - Save and close package.json file.
- Add new SharePoint module in project and name it “node_modules”. Delete “Sample.txt” file from this new module.
- Execute “npm install” in command prompt window which will install all the dependencies (above files). All dependencies will install in “node_moduels” module of project.
Now our application is ready for coding. Let’s do some coding stuff.
Create a new SharePoint module named “app” (whatever you want). We will add all manually created typescript files for this application in this “app” module.
Open “Default.aspx” file from “Pages” module. Add all required dependencies files here under “PlaceHolderAdditionalPageHead” content place holder.
<script src="../node_modules/angular2/bundles/angular2-polyfills.js" type="text/javascript"></script>
<script src="../node_modules/es6-shim/es6-shim.min.js" type="text/javascript"></script>
<script src="../node_modules/systemjs/dist/system.src.js" type="text/javascript"></script>
<script>
System.config({defaultJSExtensions: true});
</script>
<script src="../node_modules/rxjs/bundles/Rx.js" type="text/javascript"></script>
<script src="../node_modules/angular2/bundles/angular2.dev.js" type="text/javascript"></script>

<script type="text/javascript">

System.import('../app/boot.js')
.then(console.log("app imported from sharepoing..."), console.error.bind(console));

</script>
Order sequence of these files must be same to make it work.
Here “boot.js” file is not yet created, we will create it in “app” module. This file will be starting point of our application.
Now we can add custom code to display some UI stuff in “Default.aspx” file.
Implementation
Create following files in “app” module:
- boot.ts
- app-form.component.ts (We can replace ‘app-form’ by our choice of any name)
Open “app-form.component.ts” file and add following code:
import {Component} from 'angular2/core';

@Component({
selector: 'app-form',
template: `<div>Welcome to qAppSample created in Angular2 for office 365</div>
<div>Name: <input [(ngModel)]="username" placeholder="Enter your name"/></div>
<div>Hello! {{username}}</div>
<div style="padding-top:26px">Placeholder for footer note</div>`
})

export class AppFormComponent {
public username = 'Anonymous';

}
Here ‘angular2/core’ is name of core module of angular2 from which we can get @Component, @Template etc.
I am not going into details of this as this is a basic component created in angular2. If you need more help on this, please go through 5 MIN QUICKSTART.
Open “boot.ts” file which is starting point of our application. Add following lines of code in this file:
import {bootstrap} from 'angular2/platform/browser';
import {AppFormComponent} from './app-form.component';

bootstrap(AppFormComponent);
Here we imports bootstrap module from “angular2/platform/browser” module and “AppFormComponent” (Name must be same as exported class from “app-form.component.ts”) from “app-form.component.ts” component.
Now our newly custom created component is available to display. We need to add this in “Default.aspx” file to make it visible to user.
Add following line of code under “PlaceHolderMain” content place hoder:
<app-form>Loading...</app-form>
Now our application is ready to deploy on SharePoint. Right click on project and click on “Deploy” to deploy it.
Happy coding….!
I have created a new post which explains how to use latest version of Angular2 (v2.1.0) in SharePoint app.
Hi
I have applied the steps.But data is not get displayed
is not reflecting.Please help me on this
thanks
siddartha
It is working for me.
@siddartha can you please share the error that you are getting?
And if possible code snippet for the same.
[…] my last post I explained how we can create an SharePoint Add-in using Angular2 (beta version). But now Angular2 […]